info link

This website is under construction..If found any error Downloading problum Pease contect Us :- Mughees1997@gmail.com

Showing posts with label Blog. Show all posts

Saturday, 28 September 2013

How To Get Free .com Domain Under Yourname.com

Recently Google have launched Wisconsin Get Your Business Online Program . Wisconsin Get Your Business Online is designed to make it easy, free and fast for any business to get online. Any small business program with small and limited resources and products can now get their business online with the world within few minutes for free. Yes you got it right , you are going to bring your business online for free.
You don’t have to pay anything for this. It is provided by Google. Google partnered with Intuit Company, the Association of Small Business Development Centers, SCORE, and Meetup and they are hosting for free to help small business owners to to get started with their own basic .com website. The project is launched as WisconsinGetOnline (Wisconsin Get Your Business Online). This is a free program from Google. You can get signup for it from any country and get your business online easily and fast.
Free .com Domain How To Get Free .com Domain Under Yourname.com
They are providing following things with free.com domain :
  • Free, easy-to-build Intuit website
  • Free customized domain name
  • Free web hosting for one year
  • Free online tools and training
  • A free customized domain name and hosting
  • $75 in Google AdWords credit
After reading about information and the features provided by it , you might be interested to get your own free.com domain. So now I am going to show you how to get your .com domain for free.  Let’s begin the process.
  • Also read: IndiaGetOnline: Google Initiative to promote Local business Online In India

Easy way to get Free .com Domain name registration for 1 year:

  • At first you need to Go to Wisconsin homepage via this link and there you need to click on GET YOUR FREE WEBSITE button.
  • Now you need to Sign up for your free Intuit website. Then you will get following screen.
Free Intuit Website How To Get Free .com Domain Under Yourname.com
  • If you have Google account then you can sign in with it else sign up for a Google account and then sign in with that account.
  • Allow access to it and then click on Continue button.
  • Next you need to you intuit websites password. Fill the details and accept term and conditions and click on continue button.
Domain for Free How To Get Free .com Domain Under Yourname.com
  • Then you will be redirected to Intuit Website to register a free .com domain name. Click continue as shown in the above screenshot. Then you will get the following screen.
Getting started How To Get Free .com Domain Under Yourname.com
It contains three steps. Select first one i.e – Choose a domain (www.yourname.com) for your website. You will get the following screen. If you are not sure, what domain name you should buy, I suggest you to read how to select great domain name for business & 5 domain name suggestion tools.
 Get a Free Domain Name How To Get Free .com Domain Under Yourname.com
 Since you are registering a new domain name so , make sure that the domain name you are going to register is available. You can do this by entering your desired domain name under “Get a New Domain” and clicking on Check Availability  button. If it is available then you will be presented with following screen.
 Domain center How To Get Free .com Domain Under Yourname.com
Now all you need to do it click on Get Domain button. Then you will be asked to enter your contact information as shown in the belwo screenshot.
domain contact Info How To Get Free .com Domain Under Yourname.com
Enter your contact information and click on Save & Continue button. Then you will be ask to review your information. Review it , agree to the terms of service and  click on submit button.  Note : You must uncheck the Yes (Recommended) option for domain privacy because if you check it you have to pay $1 per month.
As soon as you submit it for review you will get a pop up page asking for your Billing Information. They are asking this to protect against fraudulent activities. Though your website and .com domain name are free but they still need your billing information. Enter your address details and debit/credit card information in this page. Now the real problem comes. Many of us don’t have a real debit/credit card, so to solve this problem you need to create a virtual visa credit card. You can create a virtual visa from Entropay.com. Note : You can also use other websites to create virtual visa. If you don’t want to create virtual visa then use the following virtual visa details to fill the payment options and you will be able to purchase your domain for free.
  • Name on card : Jackie Chan
  • Card type : Visa
  • Credit card number : 4067424695632061
  • Expiration date : 12-2012
  • Card security number : 279
 Virtual Credit card How To Get Free .com Domain Under Yourname.com
Now just enter your virtual visa details in the payment page and click on purchase button. Now you have successfully created your website with a free .com domain name registration. It may take an hour to activate. After it is activated, you can use their website builder to create a new website or just change the name servers by going in the domain manager to use with other webhost.
Update:
I hope this tip would help you to save some money and increase your online presence. If you find this post useful, don’t forget to share it on Google plus and Facebook.
This is a guest post by Sandip by Sandipbrt. If you would like to write for ShoutMeLoud, check our guest posting guidelines.

Friday, 23 August 2013

25 Ways to Make Money with Your Website

There are several lists with “ways to make money with a website” on the Internet, but none of them seem to be complete. That is why I decided to create this one. If you know a method that is not listed below, just let us know and we’ll update it.
waystomakemoneywebsite.jpg
Notice that ways to make money with a website are different from ways to make more money from it. Methods to increase your traffic or click-through rate will help you make more money, but they do not represent a method of making money per se.
For example, one could suggest that blending AdSense ads with the content is a way to make money from a website. In reality it’s not; it’s just a way to make more money by improving your ad click-through rate. The real monetization method behind it is a PPC ad network.
The list is divided into direct and indirect methods, and examples and links are provided for each point. Enjoy!

Direct Methods

1. PPC Advertising Networks
Google AdSense is the most popular option under this category, but there are also others. Basically you need to sign up with the network and paste some code snippets on your website. The network will then serve contextual ads (either text or images) relevant to your website, and you will earn a certain amount of money for every click.
The profitability of PPC advertising depends on the general traffic levels of the website and, most importantly, on the click-through rate (CTR) and cost per click (CPC). The CTR depends on the design of the website. Ads placed abode the fold or blended with content, for instance, tend to get higher CTRs. The CPC, on the other hand, depends on the nice of the website. Mortgages, financial products and college education are examples of profitable niches (clicks worth a couple of dollars are not rare), while tech-related topics tend to receive a smaller CPC (sometimes as low as a couple of cents per click).
The source of the traffic can also affect the overall CTR rate. Organic traffic (the one that comes from search engines) tends to perform well because these visitors were already looking for something, and they tend to click on ads more often. Social media traffic, on the other hand, presents terribly low CTRs because these visitors are tech-savvy and they just ignore ads.
List of popular CPC advertising networks:
2. CPM Advertising Networks
CPM advertising networks behave pretty much as PPC networks, except that you get paid according to the number of impressions (i.e., page views) that the ads displayed on your site will generate. CPM stands for Cost per Mille, and it refers to the cost for 1,000 impressions.
A blog that generates 100,000 page views monthly displaying an advertising banner with a $1 CPM, therefore, will earn $100 monthly.
CPM rates vary with the network, the position of the ad and the format. The better the network, the higher the CPM rate (because they have access to more advertisers). The closer you put the ad to the top of the page, the higher the CPM. The bigger the format (in terms of pixels), the higher the CPM.
You can get as low as $0,10 and as high as $10 per 1,000 impressions (more in some special cases). CPM advertising tends to work well on websites with a high page views per visitor ratio (e.g., online forums, magazines and so on).
List of popular CPM advertising networks:
3. Direct Banner Advertising
Selling your own advertising space is one of the most lucrative monetization methods. First and foremost because it enables you to cut out the middleman commissions and to determine your own rates. The most popular banner formats on the web are the 728×90 leaderboard, the 120×600 skyscraper, the 300×250 rectangle and the 125×125 button.
The downside of direct banner advertising is that you need to have a big audience to get qualified advertisers, and you will need to spend time managing the sales process, the banners and the payments.
Related links:
4. Text Link Ads
After Google declared that sites selling text links without the nofollow tag would be penalized, this monetization method became less popular.
Many website owners are still using text links to monetize their sites, though, some using the nofollow tag and some not.
The advantage of this method is that it is not intrusive. One can sell text links directly through his website or use specialized networks like Text-Link-Ads and Text-Link-Brokers to automate the process.
Text link marketplaces and networks:
5. Affiliate Marketing
Affiliate marketing is a very popular practice on the Internet. Under this system you have a merchant that is willing to let other people (the affiliates) sell directly or indirectly its products and services, in exchange for a commission. Sometimes this type of advertising is also called CPA (cost per action) or CPL (cost per lead) based.
Affiliates can send potential customers to the merchant using several tools, from banners to text links and product reviews.
In order to find suitable affiliate programs you can turn to individual companies and publishers like Dreamhost and SEOBook, or join affiliate marketplaces and networks.
List of popular affiliate marketplaces and networks:
6. Monetization Widgets
The latest trend on the web are widgets that let you monetize your website. Examples include Widgetbucks and SmartLinks. Some of these services operate under a PPC scheme, others behave like text link ads, others yet leverage affiliate links.
Their main differentiator, however, is the fact that they work as web widgets, making it easier for the user to plug and play the service on its website.
List of companies that provide monetization widgets:
7. Sponsored Reviews
PayPerPost pioneered this model, with much controversy on the beginning (related to the fact that they did not require disclosure on paid posts). Soon other companies followed, most notably Sponsored Reviews and ReviewMe, refining the process and expanding the paid blogging model.
Joining one of these sponsored reviews marketplaces will give you the opportunity to write sponsored posts on a wide range of topics. Not all bloggers are willing to get paid to write about a specific product or website (because it might compromise the editorial credibility), but the ones who do are making good money out of it.
If your blog has a big audience you could also offer sponsored reviews directly, cutting off the commissions of the middleman.
List of sponsored reviews and paid blogging networks:
8. RSS Feed Ads
With the quick adoption of the RSS technology by millions of Internet users, website owners are starting to find ways to monetize this new content distribution channel.
Feedburber already has its own publisher network, and you can sign-up to start displaying CPM based advertising on your feed footer. Bidvertiser recently introduced a RSS feed ad option as well, with a PPC scheme.
Finally, some blogs are also opting to sell banners or sponsored messages on their feed directly. John Chow and Marketing Pilgrim are two examples.
Related links:
9. Sponsors for Single Columns or Events
If you website has specific columns or events (e.g., a weekly podcast, an interview series, a monthly survey, a special project) you could find companies to sponsor them individually.
This method increases the monetization options for website owner, while giving advertisers the possibility to target a more specific audience and with a reduced commitment.
Mashable illustrates the case well. They have several advertising options on the site, including the possibility to sponsor specific columns and articles, including the “Daily Poll” and the “Web 2.0 Invites.”
Problogger also runs group writing projects occasionally, and before proceeding he publicly announce the project asking for sponsors.
10.Premium Content
Some websites and blogs give away part of their content for free, and charge for access to the premium content and exclusive tools.
SEOMoz is a good example. They have a very popular blog that gives advice and information on wide range of SEO related topics. On top of that visitors can decide to become premium members. It costs $48 monthly and it grants them access to guides, tools and other exclusive material.
11. Private Forums
While the Internet is populated with free forums, there is also the possibility to create a private one where members need to pay a single or recurring fee to join.

SEO Blackhat
 charges $100 monthly from its members, and they have thousands of them. Obviously in order to charge such a price for a forum membership you need to provide real value for the members (e.g., secret techniques, tools, and so on).
Performancing also launched a private forum recently, focused on the networking aspect. It is called The Hive, and the monthly cost is $10.
These are just two examples. There are many possibilities to create a private and profitable forum, you just need to find an appealing angle that will make it worth for the members.
List of popular forum software:
12. Job Boards
All the popular blogs are trying to leverage job boards to make some extra income. Guy Kawasaki, ReadWriteWeb, Problogger… you name it.
Needless to say that in order to create an active and profitable job board you need first to have a blog focused on a specific niche, and a decent amount traffic.
The advantage of this method is that it is passive. Once you have the structure in place, the job listings will come naturally, and you can charge anywhere from $10 up to $100 for each.
List of popular job board software:
13. Marketplaces
Sitepoint is the online marketplace by excellence. Some websites and blogs, however, are trying to replicate that model on a smaller scale.
Depending on your niche, a market place that allows your visitors to buy, sell and trade products could work well. Over the time you could start charging a small fee for new product listings.
The problem with this method is that there are no standard software on the web, so you would need to hire a coder to get a marketplace integrated into your website.
You can see an example of a marketplaces being used on EasyWordpress and on Mashable.
14. Paid Surveys and Polls
There are services that will pay you money to run a small survey or poll on your website. The most popular one is called Vizu Answers.
Basically you need to sign up with them, and select the kind of polls that you want to run your site. Most of these services operate under a CPM model.
15. Selling or Renting Internal Pages
Million Dollar Wiki made this concept popular, but it was being used on the web for a long time around (check Pagerank10.co.uk for instance).
These websites sell for a single fee or rent for a recurring fee internal pages on their domain. Usually they have either high Pagerak or high traffic, so that people purchasing a page will be able to benefit in some way.
Implementing this method on a small blog would be difficult, but the concept is interesting and could be explored further.
16. Highlighted Posts from Sponsors
Techmeme probably pioneered this idea, but somehow it has not spread to other websites. The tech news aggregator displays editorial posts on the left column, and on the sidebar they have a section titled “Techmeme Sponsor Posts.”
On that section posts from the blog of the advertisers get highlighted, sending qualified traffic their way. Considering that the monthly cost for one spot is $5000 and that they have around 6 sponsors at any given time, it must be working well.
17. Donations
Placing a “Donate” link or button on a website can be an efficient way to earn money, especially if your blog is on a niche where readers learn and gain value from your content.
Personal development and productivity blogs, for instance, tend to perform well with donation based systems (one good example being Steve Pavlina).
A small variation of this method appeared sometime ago with the Buy Me a Beer plugin. This WordPress plugin enables you to insert a customized message at the bottom of each article, asking the readers to chip in for a beer or coffee.
18. In-text Adverting
In-text adverting networks like Kontera and Vibrant Media will place sponsored links inside your text. These links come with a double underline to differentiate them from normal links, and once the user rolls the mouse over the link the advertising will pop. Should the user click on it the site owner will make some money.
Some people make good money with this method, but others refrain from using it due to its intrusiveness. It is also interesting to note that very few mainstream websites have experimented with in-text advertising.
19. Pop-ups and Pop-unders
Pop-ups are a common yet annoying form of advertising on the Internet. If you are just trying to make a much money as possible from your website, you could experiment with them.
If you are trying to grow the traffic and generate loyal visitors, however, you probably should stay away from them. Just consider the hundreds of pop-up blockers out there: there is a reason why they are so popular.
Ad networks that use pop-ups:
20. Audio Ads
Also called PPP (Pay Per Play), this advertising method was introduce by Net Audio Ads. the concept is pretty simple: play a small audio advertising (usually 5 seconds) every time a visitor enters into your website. The user should not be able to stop it, creating a 100% conversion rate based on unique visitors.
The company is still rolling tests, but some users are reporting to get from a $4 to a $6 CPM. Regardless of the pay rate, though, this is a very intrusive form of advertising, so think twice before using it.
21. Selling the Website
Selling your website could be your last resource, but it has the potential to generate a big sum of money in a short period of time.
Market places on online forums like DigitalPoint and Sitepoint are always active with website buyers and sellers. Keep in mind that they most used parameter to determine the value of a website is the monthly revenue that it generates, multiplied by a certain number (the multiplier can be anything from 5 to 30, depending on the expectations of the seller, on the quality of the site, on the niche and other factors).
Some people also make money trading and flipping websites. They either create them from scratch or buy existing ones, and after some revamping they sell them for a profit.
Related links:

Indirect Methods

22. Selling an Ebook
Perhaps one of the oldest money making strategies on the web, using a website to promote a related ebook is a very efficient way to generate revenue.
You could either structure the website around the book itself, likeSEOBook.com, or launch the ebook based on the success of the website, like FreelanceSwitch did we the book How to be a Rockstar Freelancer.
Related links:
23. Selling a Hardcover Book
Many authors and journalists leverage their blogs or websites to sell copies of hardcover books. Examples include Guy Kawasaki, Seth Godin and Malcolm Gladwell.
While most of these people were already renowned authors before they created their website, one could also follow the other way around. Lorelle VanFossen did exactly that with her Blogging Tips book. First she built her authority on the subject via her blog, and afterwards she published the book.
List of self publishing and publishing services:
24. Selling Templates or WordPress Themes
As more and more people decide to get an online presence, website templates and WordPress themes become hotter and hotter.
On this segment you have mainstream websites like TemplateMonster, as well as individual designers who decide to promote and sell their work independently.
Brian Gardner and Unique Blog Designs are two examples of websites that make money with the sales of premium and custom WordPress themes.
25. Offering Consulting and Related Services
Depending on your niche, you could make money by offering consulting and related services. If you are also the author of your blog, the articles and information that you will share will build your profile and possibly certify your expertise on that niche, making it easier to gain customers.
Chris Garrett used a similar strategy. First he created a highly influential blog on the blogging and new media niche, and afterwards he started offering consulting services to clients with related problems and needs.
THANKS


Monday, 17 June 2013

free download live traffic feed for blogger/Feedjit

Feedjit lets you see friends and visitors as they arrive on your blog or website. Know when your best friends read about your latest adventure. Be alerted when your most important clients view your latest product offering. Feedjit lets you know, right now, who is visiting your site. Simply add the Live Traffic Feed and instantly start seeing who is visiting your site as they arrive.
First click on download
Then click on Skip ad 
Sing up 
Enjoy


Or


Sunday, 16 June 2013

free download high quality blogger themes or templates


FREE download high quality themes here

Monday, 3 June 2013

How to Setup Blogger Custom Domain

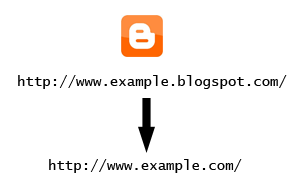
By default, your blog address is in this format; http://YOURBLOG.blogspot.com/. As you can see, all blogs hosted on Blogger have blogspot.com included in their address. Such an address is difficult to remember and it is not suitable for a professional blog. Traditionally, switching to a personalized domain required research, a web hosting comparison and the purchase of relatively expensive hosting. Fortunately, Blogger has made arrangements for those who are looking for free or cheap hosting while also upgrading to a more personalized domain name. Now, you can simply buy a custom domain directly through Blogger and forget about setting it up. In this tutorial, I'll explain this whole process of searching, buying and setting up a custom domain.

The Cost of a Custom Domain

Typically, a custom domain costs you around 10$ per year. You have to renew it annually to keep using it. Please note that Blogger provides us free hosting so no need to buy hosting.

Lets Buy & Setup a Custom Domain!

Follow these steps:
  1. Log in to your Blogger account.
  2. Go to 'Settings' then 'Publishing' tab.
  3. Click 'Switch to: Custom Domain' option.
  4. Enter the desired domain name and check its availability.
    If you're looking for a .com domain then it might be difficult to find a great domain because a lot of people chose .com domain names so good luck for that. You can also chose .net, .biz, .info or .org domains but they're not as popular as .com domains.

    How Long Will it Take to Shift to a Custom Domain?


    After setting up a custom domain, it might take up to 3 days to move to the custom domain. So, don't worry about that. Blogger also takes care of the settings behind the scenes.

    What Happens to Existing Address, Visitors & PageRank?


    Here comes the awesome features of Blogger. Your existing visitors will be automatically redirected to the custom domain. The PageRank is also kept intact so don't worry about that as well. 

Wednesday, 29 May 2013

Create a Floating Feedback For Blogger


Asking your visitors to leave you suggestions or feedbacks can be pretty easy only if you provide them with an easy access to your feedback page. Readers are often lazy and getting them to leave a feedback is often tough. However you can let them comment willingly if you add a floating feedback button to your blog, that floats as a reader scrolls down or up.


 This floating button can be made more user friendly and eye-catching if you add a roll over effect to it. Hover your mouse over my feedback button at the bottom-left corner of this page and observe how the button magnifies when you hover your cursor over it. Liked it? Lets now learn the TNT of adding a Feedback Button to your blogs, along with a Floating Back-To-Top Button, which I will discuss later. 
For a feedback button you will need two images, one small (30 by 145 pixels) and one large (35 by 170 pixels) You can also use my feedback button if you wish,


You will then need to upload these images to an image hosting web service like Photobucket or other services like Google sites and sigmirror
Get URLs for both these images and then follow the steps below
  • Sign in your blogger account
  • Go To Layout > Page Elements
Click on add a Gadget

Click on HTML/JavaScript


Now Copy paste the code below into the HTML/JavaScript widget, 

 <!--TNT-by-STC-FEEDBACK-IMAGE-STARTS-->
<a style="display:scroll;position:fixed;bottom:5px;left:0px;" href="URL Of Feedback Page" title="Your Feedback is always welcomed!"><img onmouseover="this.src='URL of your Larger Feedback button'" src="URL Of Your Smaller Feedback button" onmouseout="this.src='URL Of Your Smaller Feedback button'"/></a>
<!--TNT-by-STC-FEEDBACK-IMAGE-STOPS-->

Note:- Remember to replace the Colored text with the required detailed specified. You can change the text “ Your Feedback is always welcomed! “ with any message you like. You must have a Contact page, where users could fill up an Email form to send you their Suggestions..


Useful Tips To Reduce Blog Load Time Make your blog Faster.


Almost every newbie blogger fails when it comes to reducing blog load time. Most of the tutorials that are available on reducing the time taken for a website to load are often un-clear or incomplete. We decided to share our way of solving this problem. Below are 11 really interesting and important tips to decrease the load time of your blogs by almost 90%. 


  1. Link To All images Inside Your Template From Blogger

    Most of you use templates that are not officially provided by Blogger. These templates often contain images that are saved on services like tinypic or photobucket. When your blog loads the browser has to connect to all servers which link to your images, as a result leading to immense delay in the loading time of your blog. What you must do is replace all such images with those that you have saved inside blogger. The advantage of doing so will be this that the browser will need to connect only to blogger while loading your images. Thus saving time.
  2. Save All Images in GIF or PNG Format

    GIF stands for “Graphics Interchange Format” and PNG stands for “Portable Network Graphics” Both these formats are well compressed, smaller in size and widely supported by all browsers. But if size is concerned PNG compresses far better than GIF. In typical cases up to 5-25%.  There are some transparency issues with PNG in IE6 but since IE7 is widely used these days, transparency is nor more an issue. Using any of these image formats will tremendously reduce the load time of your blogs by 60% i.e 70-90KB The size is an approximate for my blog and true size depends on the number of images you use.
  3. Give Proper Dimensions To Images

    Giving each image a specific width and height will make it easy for the browser to load the image quickly. Always decrease the size of an image if the original size is larger. The general HTML code for an image looks like the one below,
    <img width=”” height=”” src=”URL Of Image” />
    The width and height will require a value in pixels. One pixel equals a dot on the screen. A Full size image on my blog will have a width=”590px” and height can be as long as I want. 590px almost equals the width of my posts. Hope that gives you an idea on how to choose width and height values for your images. Browsers find it easy to load images whose dimensions are specified. Make sure you make it your habit to specify a proper size for your images. If you use Windows Live Writer your life will become far easy.
  4. Don’t Use An Image As A Background

    If you are using any image as a background then kindly remove it. A background Image repeats itself horizontally and vertically and is responsible for 50% slow load time. Just remove it and see the difference. To remove a background image simply find this CSS code inside your template,                (Tip:- Its located just at the top of your blog. Simply search for body)
    body { background: #7AA1C3 url(http://xyz.com/blabla.jpg); 
    width: 980px;
    color: #333; 
    font-size: 14px; 
    font-family: Georgia; 
    margin: 0 auto 0; 
    padding: 0; }
    This code will look different in your template but you should be concerned only with thebolded black text. Simply Delete url(http://xyz.com/blabla.jpg) and save your template. Give a simple color to your background. #7AA1C3 refers to Background Color. You can change it by using my Hexadecimal Color Chart 
  5. Save All JavaScript Inside Blogger

    Why should you link to external sites for storing your JavaScript whilst you can easily save it in Blogger! Save All your JavaScript codes inside your templates just above </head> using the code below,
    <script type='text/javascript'>
    //<![CDATA[
    Paste Your JavaScript Code Here
    //]]>
    </script>
    The bolded text is where you must paste the JavaScript code that you use in your template by linking to an external site. 
    To find a JavaScript URL that links to external site, search for <script type='text/javascript'> inside your template (Make sure to check “expand widget templates” box at top-right corner). Once you find such linking, open that link in a browser. You will see large piece of complex text in the window and that is your JavaScript code. Simply copy it and paste it in the code shared above. Replace All JavaScript codes inside your template with the code above, ensuring that you have extracted the code from the link and pasted it in the code above.
  6. Always Accept Quality and Well Scripted Blogger Templates

    The major mistake most bloggers make is to upload any template that attracts them. Most un-official Blogger templates that are available in blogosphere are often created by people who are not well aware with proper use of HTML and JavaScript. A improper scripted template with empty tags ,unwanted tags and broken JavaScript often make Job tough for search engine spiders to crawl the content of your weblog. Further Browsers also waste precious time in reading broken scripts. If a JavaScript is not well coded or optimized, it can cause a readers PC to hang! Imagine this happening to readers accessing your blog. In Short use templates from authorities who have respect in blogosphere and from those who are certified professionals.
  7. Use Limited Advertisements

    If you are blogging only to get paid by displaying large chunks of ads from several sources than you are surely misusing this beautiful experience of blogging. Don’t make a blog a Fish Market. Display only few ads at major areas in your blog. Doing so will keep your blog interface clean and easy to be crawled and browse able. Each add that you display uses JavaScript that prolongs the page Load time. Make sure you limit all your ads to three.
  8. Don’t Link To Blog Directories

    It is a wrong perception that linking to several blog directories will bring you immense Traffic. When you link to several blog directories on your homepage, search engines loose trust on your blog due to excessive linking and browsers find it difficult to browse those tiny images that link to blog directories. All blog directories ask you to link back using a small image link on your blogs but doing so will only damage the success of your blog. I believe only on blogcatalog and mybloglog as relevant authorities to expect Traffic from. If you really want some amount of traffic from blog directories then trust only on blogcatalog and mybloglog. Moreover accept only the small piece of meta tag from them rather linking to them.
  9. Don’t Use Widgets From Blog Directories that Use Images

    I refer to the famous recent Viewers widget by blogcatalog and mybloglog. These widgets use JavaScript that link to these sites and also display images that add up to the load time of your blog. I use meta tags provided by them rather using their widgets. This helps in reducing the time taken for my pages to load. If you really want to use these widgets then try displaying few images on them, as low as 10.
  10. Summarize your Posts Using The Read More Link

    Full Length Posts at homepage is one of the biggest reasons why a blog has high load time. Summarize all your posts by using the continue Reading Link or Read More Link. 
  11. Show Only Four-Five Posts At Home Page

    Don’t show more than 4-5 posts at Homepage. Doing so will keep your readers busy reading different posts and they will also find it interesting to see how fast the homepage loads.
  12. Eliminate External Links

    Don’t use widgets that are from external sites other than blogger. Get rid of stat counters and use Google Analytics. Don’t store images on other services but Blogger. Save all JavaScript code inside blogger as discussed above. Don’t add links from blog directories, they don’t bring Traffic with exception of blogcatalog and mybloglog.

Note:-

Don’t Mess Up CSS and HTML Code By Removing The Line Breaks
Many Bloggers who are not well aware with web designing think that by removing the gaps between lines inside blogger template will reduce the size of a template. What they don’t realize is the fact that doing so will only reduce the template size by 2-4KB or even less, which is almost negligible reduction when it comes to fast browsers present today. Removing the line breaks between the codes inside blogger will distort the overall presentation of your template, making it difficult to edit it. Kindly avoid all such un-professional tips and always take suggestion from an expert before taking any such step.

Twitter Delicious Facebook Digg Stumbleupon Favorites More